


Understanding Deck Construction Basics
Building a deck can be an exciting project that not only enhances your outdoor living space but also increases the value of your home. Deck construction involves several key components that every DIY enthusiast or professional builder must understand. This comprehensive guide will dive deep into the essentials of deck construction, from initial planning stages to maintenance after completion.
What is Deck Construction?
Deck construction refers to the process of designing and building a wooden structure, typically outdoors, that provides a level surface for recreational activities and connecting spaces. Decks can vary in complexity, from simple platforms to multi-level creations with features such as railings, stairs, and built-in furniture. The primary goal is to create a safe, durable, and visually appealing space that complements the home’s aesthetics and functions well for outdoor entertainment, relaxation, or both.
Key Materials Used in Deck Construction
Choosing the right materials is pivotal in deck construction. Here are the primary materials involved:
- Decking materials: Common options include pressure-treated lumber, cedar, redwood, composite, and PVC decking. Each type has its own benefits in terms of durability, maintenance, and cost.
- Framing materials: Typically made from treated wood, framing includes the beams and joists that provide structural support for the decking.
- Fasteners: Stainless steel or coated screws and nails are preferred due to their resistance to rust and corrosion, which prolongs the deck’s life.
- Railings: Railing systems can be wood, metal, or glass, adding both safety and visual appeal to the deck.
- Concrete and footings: Essential for stability, footings are concrete blocks placed deep in the ground to support the deck’s weight.
Building Codes and Regulations for Decks
Before embarking on deck construction, it is crucial to familiarize yourself with local building codes and regulations. Most areas require permits for building a deck, especially if it exceeds a certain height or square footage. Compliance with local codes ensures that the structure is safe and meets zoning laws. Common regulations may include:
- Height restrictions for decks over a certain elevation
- Requirements for railings and stairs (including their width and height)
- Specifications for materials used in construction to ensure safety and durability
- Inspection processes to verify compliance throughout the construction stages
Planning Your Deck Project
Selecting the Perfect Location
The location of your deck can significantly affect its usability and appeal. Key considerations when choosing a location include:
- Sunlight Exposure: Consider how much sun or shade you want the deck to receive throughout the day.
- Accessibility: Ensure easy access from indoor areas of your home, like the kitchen or living room.
- Views: Position your deck to take advantage of the best views while maintaining privacy from neighbors.
- Ground Condition: Assess the soil and terrain where the deck will be built; this affects stability and drainage.
Budgeting for Your Deck Construction
Proper budgeting is essential for any construction project. Here are steps to create a realistic budget:
- Determine Costs: Itemize costs for materials, tools, labor (if hiring professionals), and any permits.
- Contingency Fund: Set aside approximately 10-15% of your total budget for unexpected costs that may arise during the project.
- Compare Material Costs: Research various materials and their prices to select options that align with your budget without sacrificing quality.
Creating a Design Plan
A cohesive design plan will streamline the construction process and ensure that the finished product meets your expectations. Consider incorporating these elements:
- Size and Shape: Decide on the dimensions and layout based on available space and intended use.
- Features: Think about including features such as built-in seating, planters, or lighting.
- Drawings: Create detailed sketches or blueprint diagrams to visualize the final outcome and guide construction.
Essential Tools for Deck Construction
Overview of Required Tools
Having the right tools can simplify deck construction significantly. Key tools include:
- Measuring Tape: Essential to ensure accurate measurements for framing and leveling.
- Level: To guarantee your deck surface is perfectly flat and stable.
- Saw: A circular or miter saw is necessary for cutting lumber to the desired size.
- Drill: Used for driving screws into wood and joining pieces securely.
- Pry Bar: Helpful for removing old decking and adjusting components during assembly.
Safety Equipment for Deck Builders
Safety should always be a priority during deck construction. Here are essential safety gear items:
- Gloves: Protect your hands from splinters and cuts.
- Safety Glasses: Shield your eyes from flying debris when cutting materials.
- Hard Hat: Wearing a hard hat can guard against falling objects, especially if the deck is raised.
- Steel-Toed Boots: Essential for foot protection around heavy materials.
Maintaining Your Tools
Proper maintenance of tools not only extends their life but ensures safety and effectiveness. Follow these steps to keep your tools in good condition:
- Clean Tools: After use, clean dirt, sawdust, and grease off tools.
- Check for Damage: Regularly inspect for wear or damage and replace any faulty tools.
- Store Properly: Keep tools in a dry place to prevent rust and corrosion.
Step-by-Step Guide to Deck Construction
Preparing the Site and Foundation
Site preparation is crucial for any construction project. Here’s how to prepare your space:
- Clear the Area: Remove any debris, plants, or obstacles from the desired deck location.
- Inspect the Soil: Ensure the soil is stable enough to support the weight of your deck.
- Mark Your Boundaries: Use stakes and strings to define the deck’s dimensions.
- Excavate for Footings: Dig holes for concrete footings below the frost line based on local requirements.
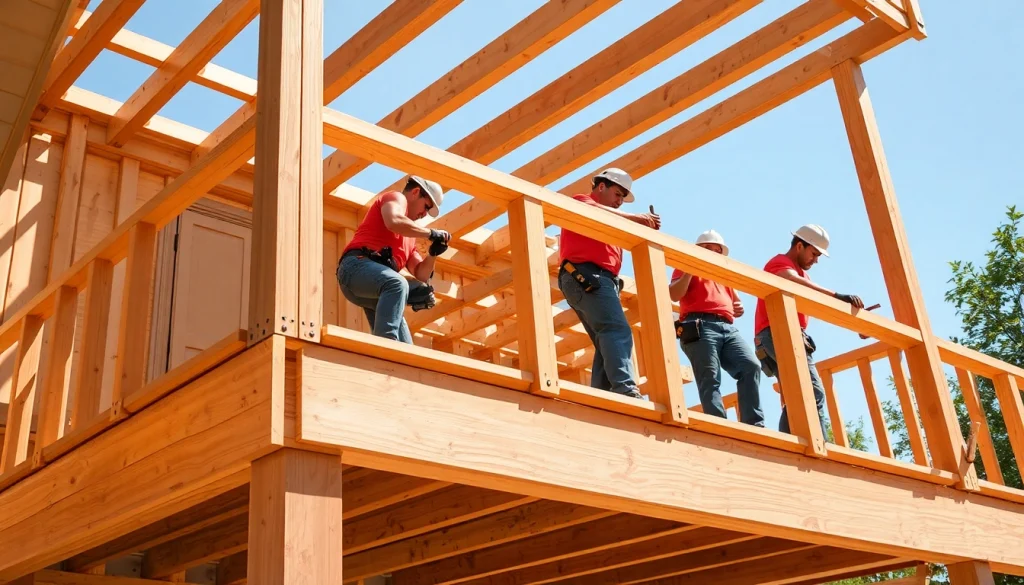
Framing the Deck Structure
Once the site is prepared, you can begin framing the deck. Here’s how to frame successfully:
- Install Footings: Pour concrete into the holes and insert post anchors while the concrete is still wet.
- Attach the Ledger Board: Fixed against the structure of the home, the ledger board connects the deck to the house.
- Set Posts: Attach vertical posts to the installed footings and secure them using brackets.
- Install Beams and Joists: Lay out the beams supporting the joists, and then fasten the joists into place securely.
Finishing Touches for Your Deck
Once the framing is complete, it’s time for the finishing touches:
- Lay Decking Boards: Nail or screw down the decking boards perpendicular to the joists.
- Add Railings: If your deck is elevated, install railings for safety. Ensure they meet local height regulations.
- Apply Finishing Products: Protect your deck with sealants, stains, or paints to enhance durability and aesthetics.
- Inspect for Safety: Make sure all fasteners are tight, and the surface is smooth to prevent splinters.
Maintaining Your Deck
Regular Maintenance Practices
To keep your deck looking great and functioning well for years, regular maintenance is crucial. Recommended practices include:
- Cleaning: Regularly sweep the surface to remove debris, and wash it periodically with a deck cleaner.
- Inspecting: Check for loose boards, broken railing, or rusted fasteners after severe weather.
- Reapplying Stain or Sealant: Depending on the type of material used, you may need to restain or reseal every few years.
Common Deck Problems and Solutions
Even with regular maintenance, issues may arise. Here are some problems you might encounter and their potential solutions:
- Squeaky Boards: Tightening loose screws or replacing fasteners will often solve this.
- Splitting Wood: Sand down the affected area and apply a wood filler to repair minor splits.
- Rotting Wood: Replace any severely damaged boards and consider increasing drainage in affected areas.
When to Call a Professional
For extensive repairs, complicated designs, or if you’re not confident in your DIY ability, it’s wise to hire a professional. Signs you may need to call for help include:
- Extensive structural damage that affects safety
- The need for advanced designs that exceed your skills or knowledge
- Lack of time or resources to complete the project